Contact information
The contact information block provides a simple, consistent, reusable format for including contact details like phone, email, address or social media links, for NSW Government departments, agencies or services.
When to use a contact block
Do
- Create a contact in micro-content if you plan to have a 'Contact us' section on multiple pages.
- Provide clear and accurate contact information, including the office address, phone number, email address, and any relevant social media handles.
- Ensure phone numbers, email addresses and addresses are formatted following the guidance from Digital.NSW – Content style guide.
- Generally position your contact block at the end of the page. Ensure you give the contact block a heading <H2> so it appears in the page navigation.
Don't
- Don't use vague or incomplete contact information that could confuse or frustrate the audience.
- Don't forget to update the contact information if there are any changes, such as a new phone number or office location.
- Don't bury the contact information deep within the website or make it hard to find.
How to create a contact
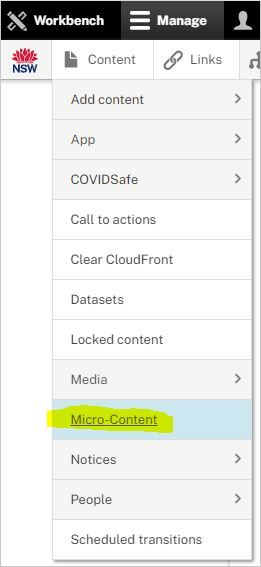
Go to Content > Micro-Content.
+Add micro-content.
Select > Contact.
Note that there are 2 tabs in Add contact – Content and Authoring.
It is recommended to go to the authoring tab first and choose an Editorial group.


Content tab
Add a Label (mandatory) – generally this should be the name of the department, agency or service – visible to the audience.
It will also help you find your contact in the list.
Contact summary (optional) – include additional information for the audience that will help them contact the department, agency or service.
Contact email (optional):
Email label – generally use the label 'Email' – visible to the audience.
Email address – add the email address.
Drupal will automatically make the email address a clickable link (mailto:).
Note that there is the option to include another email address if required – Add Email item.
Contact phone (optional):
Phone label – generally use the label 'Phone' – visible to the audience.
Phone number – add the phone number. Ensure the phone number is formatted following the guidance from Digital.NSW.
Drupal will automatically make the phone number a clickable link (tel:).
Phone operating hours (optional) – for example, 'Monday to Friday, 9am to 5pm.'
Note that there is the option to include another phone number if required – Add Phone item.
Contact website (optional) – include a link to related contact details or to an online contact form.
Website label – should reflect the purpose of where you are linking to.
URL – add the website URL or link to an internal page using the node number.
Note that there is the option to include another website if required – Add Website item.
Social media links (optional) – add the URL for some or all of the social media feeds that relate to the contact. By design, social media displays as a hyperlinked logo that is associated with the social media company.

Facebook link
- LinkedIn link
- X link
- Instagram link
- YouTube link
- Save – the contact is now available to be added to your page.
Add the Contact information component to your page
By design, the Contact information component displays with a grey background.
- From drop down Add Contact information.
- Give the Contact information block a Heading – this displays as a <H2> and will appear in the in-page navigation.
- HTML summary (optional) – include any further information that may help the audience.
- Contact – start typing the name of the Label of the contact your created in micro-content.
- Save your page to check the display of the Contact information component on the page.
How the Contact information component displays
Note that in this example, all the available contact micro-content fields have been entered.

Live examples
You can see live examples of how agencies have applied the component to their content.