Using the case study template
Do
- Create case studies to promote a specific project with a defined purpose and outcome.
Don’t
- Use case studies for content that you want to fit within your site navigation. Case studies are only surfaced through Case study finder components or other search components. Consider using a standard page template instead.
How to create a case study
- Go to the megamenu and select Content > Add content > Case study.
- The Add Case study default screen will open and you can complete the following tabs.
- Add a Title for your case study. This will show at the top of the case study page as the page title and also in any Case study finder components that show a listing of case studies, such as this SmartNSW Case Study Library.
- Add a Summary to provide an overview of the case study. This will show on the case study page below the title and with the case study listing in Case study finder components.
- In the Block container add details of your case study. You should provide an introduction, challenge, solution and outcomes of the case study. You can also include additional resources, contact details or media information.
The Quick facts tab includes optional fields that you can add additional information for your case study. Most fields allow for free text, but those with the look-up symbol will only allow for an option to be selected from a fixed list of look-up options.
If you complete the Quick facts fields, the information will display in the right side column of the page. Each field name will display as an H5 heading with the information you add appearing below.
For example:
Start date
Q3 2023
Short title (optional)
Use the short title field if you want to shorten your page title for site navigation and breadcrumbs to prevent text wrapping for long page titles. Use sentence case. If no URL slug is used, the short title will also modify the URL.
URL slug (optional)
You can use the URL slug field to modify the end part of your URL. Use the URL slug to create a shorter, SEO-friendly URL and prevent duplication of words.
The URL slug will override the URL that is automatically generated from the page title.
The URL slug:
- must be lowercase
- must separate words with a - (hyphen)
- should include the page's primary keyword
- should not exceed 32 characters.
Add an image by clicking on the Add media button.
The image will dynamically resize depending on the device it is being viewed on.
See the image guidelines for image selection and specifications, naming files and uploading images to the CMS.
There are 3 mandatory fields you need to complete in this tab.
Agency (mandatory)
- Start to type the name of the relevant Cluster or Agency in the Agency field and select from the drop down list.
- You can choose more than 1 agency however, the first Agency listed will be the main agency for the content and will receive the Google Analytics data for the page.
Audience (mandatory)
- You must select 1 or more audience types, that your content is relevant for.
Topic (mandatory)
- You must select at least 1 of the 20 main Topic tags, that is relevant to your content.
- The list of main topics can be found on the homepage.
Notes
- It is optional to add other tags as relevant such as Category, Topic or Keywords.
- Discuss with your team what tagging may be required if you are planning on creating lists with your pages.
- Tags are only used to group related content together and do not play a part in SEO.
Go to the Right hand side page menu > Governance > Editorial group.
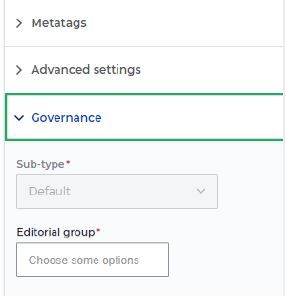
- Select the Editorial group/s that will be responsible for keeping this new web page updated. You can choose more than 1 group.

Do include the In page navigation for content that has more than 2 sections:
- The in page nav listing is automatically created based on the H2 headings on the page.
- The in page nav will automatically be placed at the top of case study page under the title and summary.
- By default, the in-page nav is included when you create a new case study page. You have the option to exclude the in-page nav.
Navigation settings are found in Advanced settings on the right side of the page in the set up menu.

3. Click the Save button.
How case studies display
Your case study will display the page title, summary and body copy on the left and the image and key facts on the right.

Live examples
You can see live case studies listed on: