Resource template – single and multi-page
Resource pages are web pages for documents. A resource page can have files attached or be entirely converted to digital content and used instead of the original downloadable file. A resource can be a single web page or turned into a booklet style multi-page resource with an index and child pages.
Using resource pages
Do
- Create a resource page for your PDF files.
- Use a resource page for documents that will be updated with newer versions. By always linking to the resource URL (and not the PDF file URL) customers will always see the latest document version.
- Consider converting a PDF file into a resource web page by moving all the content on to the resource web page. You may attach the PDF file to the resource page if it is still considered necessary.
- Use the multi-page resource template for larger documents to create a booklet style digital resource.
- Add multiple PDF documents to a single resource page if they are all related and a single overview can summarise all the attached documents.
Don't
- Create empty resource pages without text that summarises the attached file.
- Leave resources to become out-of-date. Set reminders to alert relevant reviewers to check content is still accurate.
Why convert a PDF into a resource
You can move the content from within a PDF on to a resource web page instead. It is usually best practice to convert PDF documents into resource web pages because:
- Search engines, like Google, are better able to search and index web pages than PDF files.
- HTML is a responsive and adaptive format, meaning that the content usually displays better on mobile devices.
- Web pages are usually more accessible and easy to navigate.
It is not always appropriate to convert a document into a resource web page. Examples of when content shouldn't be converted include:
- Resources that are intended to be printed and distributed, such as classroom posters.
- Resources that have been translated into other languages for a specific audience and purpose and that language isn't supported by the CMS.
Content tab – includes mandatory fields
Enter a title for your resource page in the mandatory Title field. When creating your title:
- Use sentence case unless brand names or proper names are in use. No special characters. Aim for a maximum of 50 characters.
- The resource title forms the end of the URL and appears in the breadcrumb at the top of the page.
- The title displays as the H1 heading for the article and is the default meta title for SEO (Search Engine Optimisation).
Enter a short summary of your resource in the mandatory Summary field.
- This summary will display on the resource page below the page title in the hero banner for the page.
- The summary is the default meta description for SEO, of which the recommended length of copy is 140 to 170 characters.
All resource pages display with a Hero banner by default.
In the Block field, enter the body content for your resource. You can either:
- Take the full content from the PDF and add it to the page – effectively converting the PDF into an HTML web page. See why a web page is usually be better than a PDF. If there is a lot of content a multi-page resource might be best.
- Enter an H2 heading and an overview of the attached PDF resource. The overview should be at least a paragraph long and give the user a good understanding of the information contained within the resource’s PDF to decide if they want to download the file.
Using Block / WYSIWYG fields
See the Block / WYSIWYG editor guide to understand how to edit the content block field.
When adding content you should always clean your text using Notepad or other text editor before cutting and pasting it into the summary or WYSIWYG text field. Cutting and pasting from Word documents or emails can import disruptive HTML like line heights and <span> code which affects accessibility for the audience who use screen readers and other assistive technologies.
Resource tab – includes mandatory fields
Short title (optional)
Use the short title field if you want to shorten your article title for navigation and breadcrumbs to prevent text wrapping for long article titles. Use sentence case. If no URL Slug is used, the short title will also modify the URL.
URL Slug (optional)
You can use the URL slug field to modify the end part of your URL. Use the URL slug to create a shorter, SEO-friendly URL and prevent duplication of words.
The URL slug will override the URL that is automatically generated from the page title.
The URL slug:
must be lowercase
must separate words with a - (hyphen)
should include the page's primary keyword
should not exceed 32 characters.
Resource Publication type
Select the most appropriate publication type that describes your document.
Resource media
Upload your PDF file in the Resource media field. You can upload multiple files.
It isn’t mandatory to upload a PDF file to your resource. You may have chosen to completely convert your PDF into a resource or multi-page resource and no longer need a downloadable PDF file at all.
If you add a file to your resource page it will appear at the bottom of the resource page under an H3 heading titled Download or print.
Publication date
You will need to enter a publication date for your resource. If there is no document date and it hasn’t been previously published, use the current date.
Media tab
You can add an image to display at the top of the page in the hero banner, however all images should comply with the image selection and image file names, titles and alt text guidelines.
Tags tab – mandatory
The 3 mandatory fields you need to complete in this tab are Agency, Audience and Topic. It is optional to add other relevant tags such as Region or Audience.
Agency (mandatory)
- Start to type the name of your Agency and select from the drop down options list.
- You can choose more than one agency however, the first one listed will be the main agency for the content and will receive the Google Analytics data for the page.
Audience (mandatory)
- You must select 1 or more audience types, that your content is relevant for.
Topic (mandatory)
- You must select at least 1 of the 20 main Topic tags, that is relevant to your content.
- The list of main topics can be found on the homepage.
Tags are only used to group related content together and do not play a part in SEO.
Connections tab – includes mandatory fields
Parent (mandatory)
- Start to type the name of your Parent page and select from the drop down options list.
- The Parent you select will determine the URL structure and breadcrumb navigation at the top of the page.
Related links
If you add pages in the Related links field they will display at the bottom of your resource page in a link list style under an H2 heading title Related links.
Governance – Editorial group – mandatory
- Go to the Right hand side page menu > Governance > Editorial group.
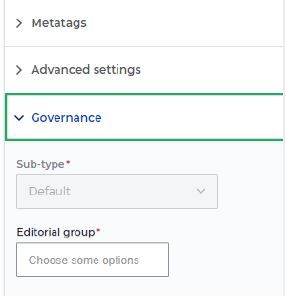
- Select the Editorial group/s that will be responsible for keeping this new web page updated. You can choose more than one group.

Once you have completed all the mandatory fields, and set the navigation options, scroll to the bottom of the page and click Save.
You can now edit your new resource page by selecting Pre-Published Draft > Edit content in the top right hand corner.
When you edit your resource page you will be prompted to set a review date and choose a reviewer to be notified on that date. This is to ensure content stays up-to-date.
How to create a multi-page resource
To make a multi-page resource:
- Follow the steps to create and save a single page resource.
- Go to the mega menu and select Content > Add Content > Standard page.
- Choose Standard Page: Resource standard page, click Submit and the Add Resource standard page (Standard Page) screen will open.
- Go to the Connections tab and enter the page title of the single page resource (that you created in step 1) in the Parent field – this will automatically convert your single page resource into a multi-page resource.
- Complete all other tabs (Content, Resource, Media and Tags) – just like when you create a resource page, although the Summary field won't show on the page, only in search results.
- Save your new resource standard page.
Reorder multi-resource child pages
After you have created several resource standard pages you might want to change the order they display in. To change the order of child pages:
- Go to the top right of your main Resource page and select Tasks > Children.
- Drag and drop child pages into the order you would like them to display.
- Click the Update child order button. It may take a couple of minutes for the update to process.
How resource pages display
Resource template examples
See examples of how the single and multi-page templates display with dummy information.
Single page resource
An example of how a single page resource displays.
Multi-page resource
An example of how a multi-page resource displays with interactive pages.
Live examples from agencies
You can see live examples of how agencies have applied the resource templates to their content.
Single page examples
- Department of Communities and Justice volunteer recognition guidelines – has a single PDF document attached and related links.
- NSW Government's Special Commission of Inquiry into the Drug 'Ice' – has multiple PDF documents attached.
- Create NSW 2021-2022 Year in Review – has a single PDF document attached and hero banner image.
- NSW Government's Review of grants administration in NSW – has multiple PDF documents attached.
Multi-page examples
- NESA's Complaint handling policy and process – has no PDF documents attached.
- NESA's Privacy Management Plan – has multiple PDF documents attached.
- NSW Treasury's Women's Opportunity Statement – has a single PDF document attached.